When supplying visual materials with braille books for the most part the use of tactile graphics is sufficient. However, there are many instances when providing 3D printed objects can enhance the understanding of the material. Even the Tactile Graphics Guidelines Mention 3-dimensional objects in the first sentence of the document: “Tactile graphics, in combination with 3-dimensional models, need to be introduced early in the process of learning braille.” Throughout this document 3-dimensional models are mentioned many times.
However, when it comes to practical implementation, rare are the books which are supplied with 3D objects. When I talked with many teachers of the visually impaired and with braille transcribers, their response was that while they are aware of the possibility of using 3D objects, but there is very little information on how to source these and what it really takes to get it produced.
In this post I will talk about what makes a good candidate for 3D printing and what is better supplied in 2D, or not at all. I will also look at the production process to help make the decision if 3D representation is indeed the right option for a particular object.
When do you need 3D models?
The Tactile Graphics Guidelines say:
“1.4 A decision must be made about which would be more clearly understood by the reader—a well-stated transcriber’s note, a tactile graphic, a simplified tactile graphic with a transcriber’s note, or a 3-dimensional model.”
Let’s look at what this means.
Some graphics are decorative. Unless there is a reason you would like to make a representation of it, if it doesn’t add to the understanding of the material it can be omitted. For example if a table is placed into a grid, describing the grid does not add value to the content.
A transcriber’s note can be useful for example when there is a pie chart, it could be interesting to show what it is like, but the most important thing is the data or ratios you get from the chart. This could just be described.
A tactile graphic can be useful when something can be represented in two dimensions, such as a map showing cities and rivers.
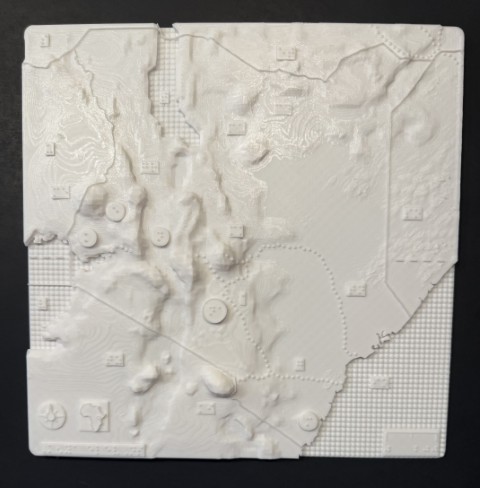
A 3D representation could be more useful when it is an elevation map, where the shape of the hills or mountain ranges is important.
Examples where 3D can be relevant
Elevation maps
On a tactile graphic, you can indicate the height of a mountain with different textures. You can have a texture for one mile height, two miles height, etc. And this is useful information. But on a 3D map, you can show the exact shape of the mountains.
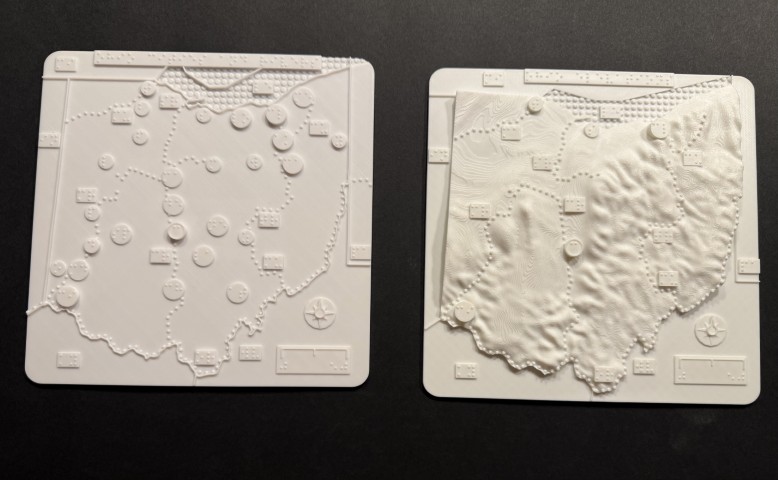
However, when we made two Ohio maps, one elevations and one cities, it was not necessary to create the cities map in 3D, because it was two dimensional. The only reason we made it in 3D was because we wanted to make our maps to be uniform, but a braille version on paper would have sufficed.
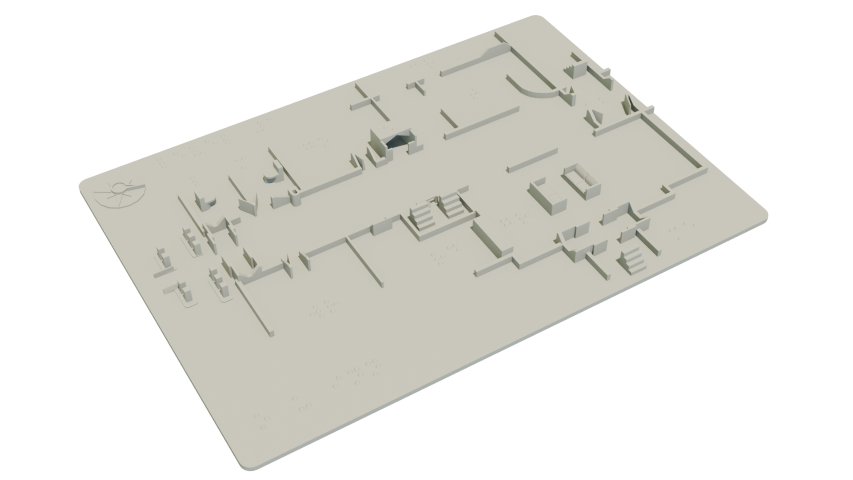
Floor plans and parks
This could be quite complex in 2D, because there is a lot to show.
- Stairs, elevators, escalators
-
Entrances/doors/emergency exits
-
Walls/boundaries
-
Columns
-
Front desks
-
Room locations
-
Restrooms
-
Benches
-
Fountains
-
Sculptures
-
Trees
-
Miscellaneous obstacles
-
Walkways/paths
-
Lakes/ponds
On a 2D tactile map, it is not recommended to have more than 5-7 types of marks. As you can see from the above list, there could easily be many more. If you create textures for each of these, it can be confusing, or at the very least a huge learning curve to figure out the meaning of the individual marks.
But what happens on a 3D map?
You can create objects which resemble what they feels like on the actual environment.
- Stairs: you can create small steps
-
Escalators: just like steps, but a straight incline
-
Elevators: a little box with door looking openings with a braille E on top
-
Doors: small raised vertical lines which can even show which way the door opens
-
Walls and columns: raised lines or squares
-
Information desks: raised bars
-
Restrooms: raised toilets
-
Benches, fountains, statues: simplified shapes of the objects.
-
Etc.
You can still provide a map key, but these will be either obvious, or easy to recognize, minimizing the learning curve. Not to mention that they will take up a smaller space.
Buildings and architecture
To represent a building in 2D, you have to simplify everything basically showing the shape of one side of the building. But on a 3D model, you can show the exact shape of the building, show entrances, windows, roofs, decorations, etc. A 3D building model allows the viewer to imagine the building much better, while providing the details that will not fit on a 2D graphic.

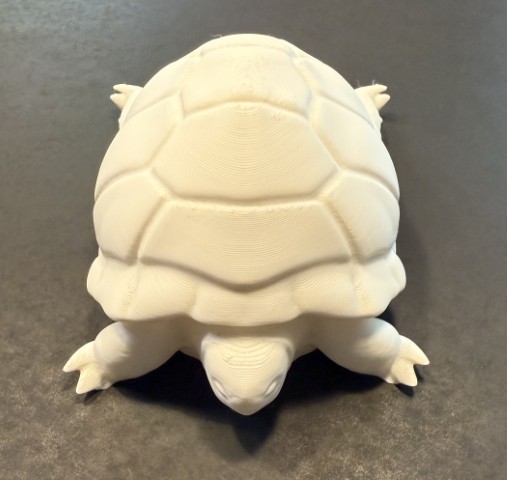
Animals
Let’s look at a turtle as an example. On a 2D graphic you can show the outline, or on a 3D object you can show the length of the legs, the curve of the back, shape of the head.
Biology
Let’s look at the example of a heart or a liver. You can show the outline of the organ, or you can show the exact shape, representing it exactly what it feels like. For example, instead of showing the veins as lines from the heart, you can indicate the exact shape of the veins.
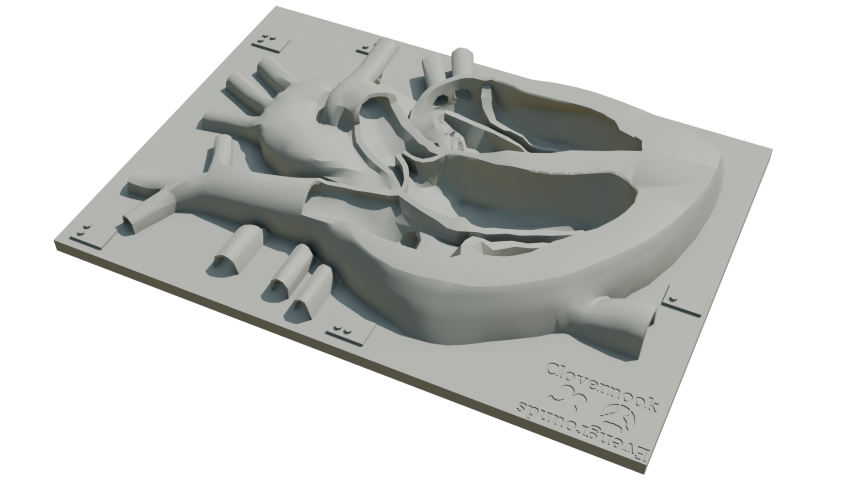
Instead of showing the parts of the eye as a diagram, you can create the exact shape and show how one part relates to the other.
And all this with very little explanation.
Paintings and photography
When a sighted person looks at a photo or a painting, from the 2-dimensional representation they can immediately know what it feels like. However, the 2D experience does not show the depth of the objects, but a higher relief of a face or a building can provide a much more realistic view. While it is not exactly like the original picture, it can provide a better understanding. When you would like to represent the picture as it is on the original instead of providing the feel of it, probably a 2D representation would work better.
The cost of 3D printing
The other thing to consider is the cost of creating a 3D object. Ideally when creating educational materials, cost should be a secondary consideration but it doesn’t work in practice when you have a set budget. Creating 3D models is more expensive than 2D, so it is important to pick wisely what will be modelled.
The least of the cost is the filament. When 3D objects are printed, they use a certain percentage of infill, usually 10-15 percent, so the inside of the object is filled enough so it doesn’t break or collapse, but it is full of holes internally, while still keeping it sturdy, not impacting the outer areas. I stress tested many of my replica buildings with a 10 percent infill and couldn’t damage it. This definitely cuts down on the price of material.
What is costly in 3D printing though, is time. A replica building can take 3-10 hours to print, a smaller map 4-5 hours, larger maps made of pieces can easily take almost a day.
The other cost is if you will buy your own 3D printer, or you will outsource the production. A 3D printer these days is not very expensive, you can get a nice one under $1000, but it will be the time commitment to learn to use it and operate it. Outsourcing the production can be more costly but if you only need a few things here and there it is cheaper than buying a printer.
But the highest cost is the design. Unless you already have the 3D objects, you either have to design it yourself, or hire a company to do it for you. Creating 3D models definitely has a learning curve, the advantage of hiring a company is that you have experienced designers who can probably do it faster thus making it more cost effective. However, it is important to make sure that the 3D designer understands accessibility, because many things will be different when building for visually impaired people.
Using braille
It is tempting to use 3D printed braille, such as for creating map keys or adding extensive labels to objects. But the cost is very high because of the time it takes to print. Braille generally is not as good when 3D printed as it is on paper, but not too bad, especially if you print it vertically. But unless you have a space where all you have to do is adding the braille dots which can be quick, the braille will need support. For example if you want to create a map key or a short explanation to add to an object, you will have to create a board that you will put the braille on. Now if it has to be as thick as the map you create it for so you can add the key, a page of text can easily take many hours.
To give you an example, recently a client asked me to create about 8 pages of braille content with a particular specification. It would have taken about 60 hours to print this out, and though it was going to be very nice, it simply wasn’t worth the time. Instead we decided to print it on plastic sheets which only took a few minutes on a braille embosser.
Conclusion
As you can tell, there is a lot that goes into deciding if something should be in 2D, or 3D. Both have major advantages, and 3D can often be much more beneficial. However the above explanation is barely scratching the surface. There is so much that goes into it, the way we design it, the way we make an object accessible, the way we source the materials or do the research to do the design.
I already wrote a few articles about this topic and I am planning to uncover more of what we need to take into consideration.
However, if you have any questions, or would like us to design your models, get in touch and I’ll be happy to help you.
No comments! Be the first commenter?