In order for us to create an accurate 3D printed tactile restroom map, we will need an accurate representation of a restroom.
If it is available, the best approach is to provide an accurate floor plan. However, a floor plan may not have everything we will need, for example paper holders, towel dispensers, etc. But a floor plan helps with accurate measures.
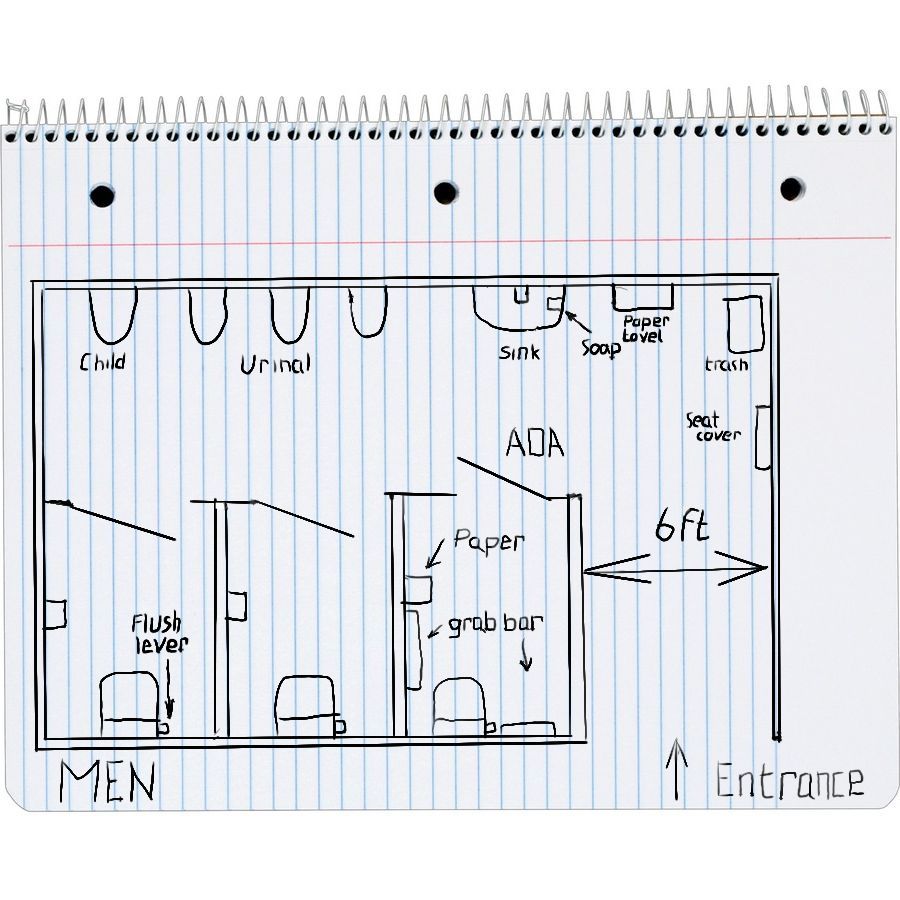
If a floor plan is not available, the next best approach is an accurate sketch, where you can indicate all appliances.
If you prefer, you can also create photos or videos.
For photos, capture the complete layout of the restroom.
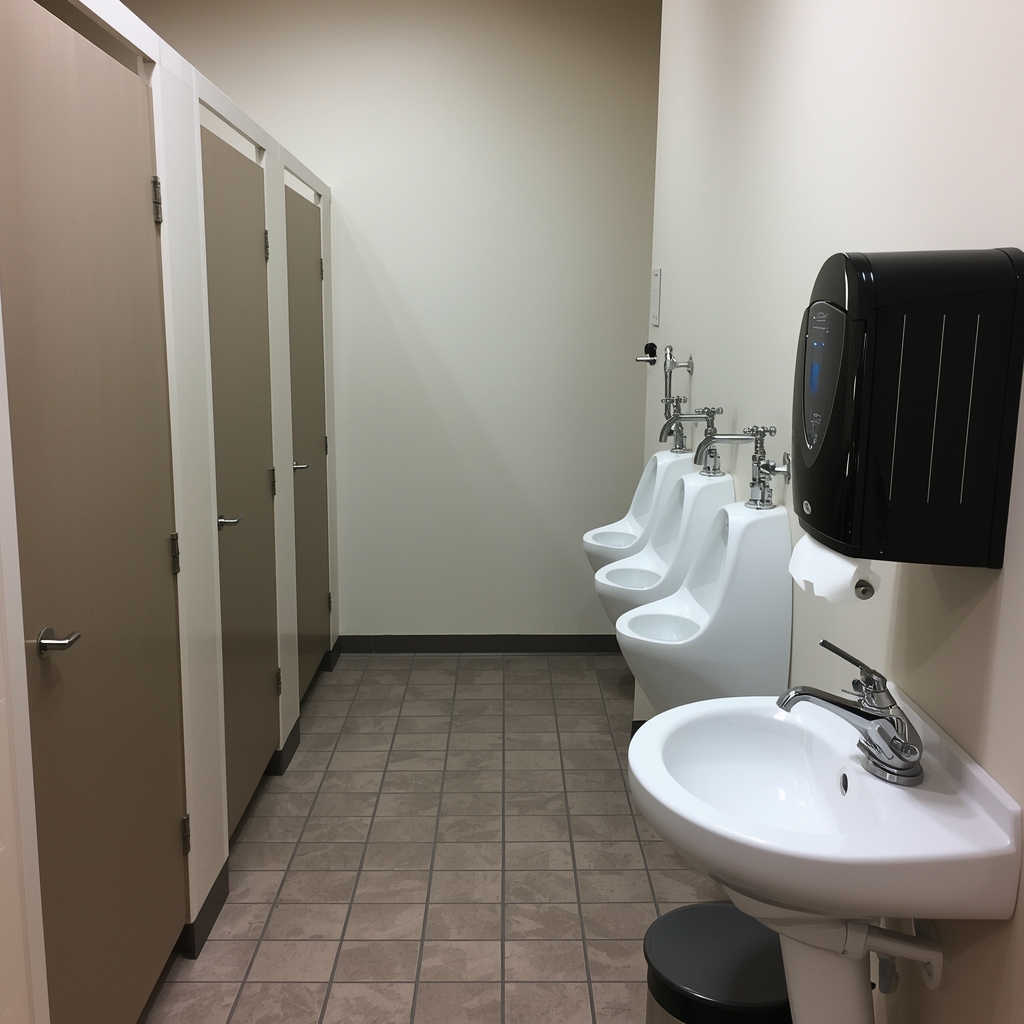
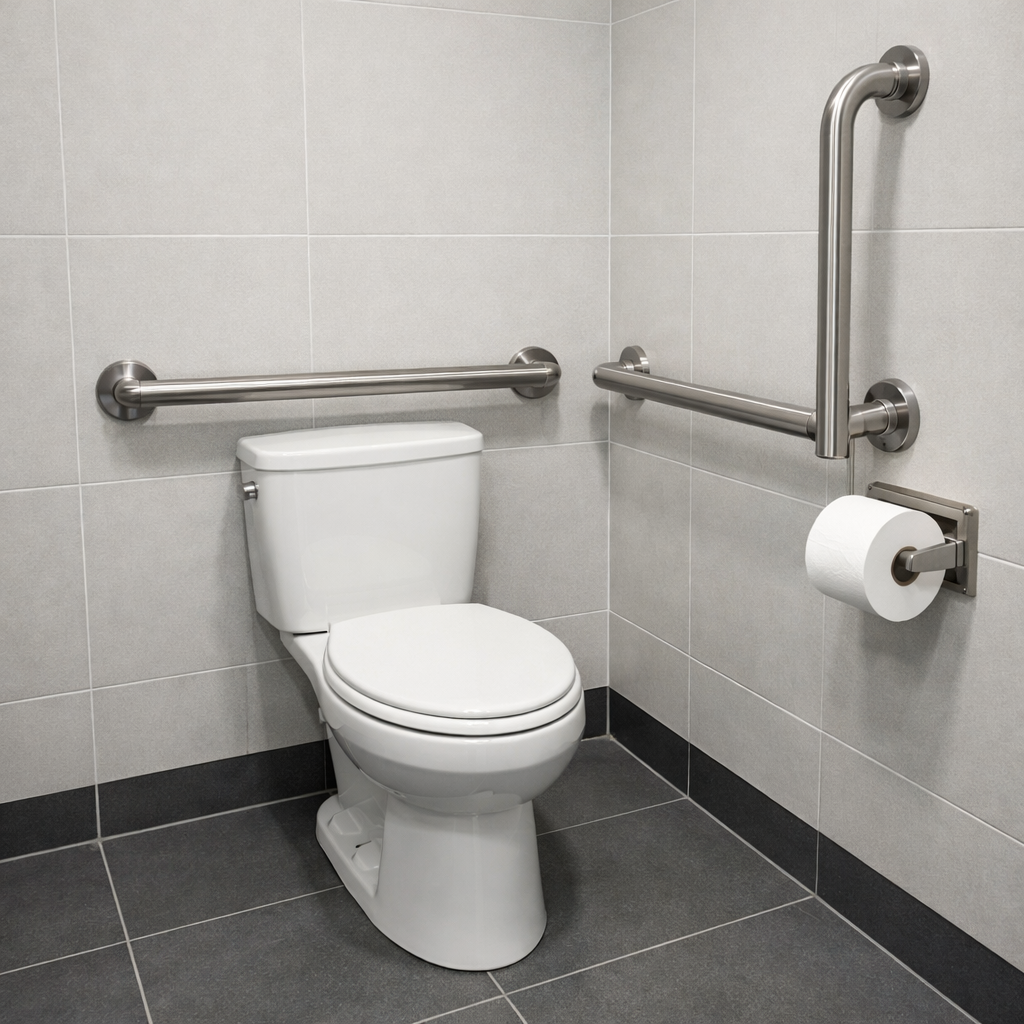
Once that’s done, take pictures of the individual smaller sections, like all stalls, sinks, etc. It is important to know that the setup maybe different, for example the paper holder maybe at a different place in a wheelchair accessible stall. Therefore, either capture these individually, or if these are identical document it.
Please note that the final result will not be 100 percent accurate and so it doesn’t have to be, but it will be very close. Given the scale of the tactile map, it is not relevant to make everything scale properly to the tenth of a millimeter. What is important though is that the distances are very closely indicated. For example when the distance between two sinks is one foot, and the map will be at a scale of 1:40, on the map this will mean 0.3 inches. Thus in practice, making the map accurate we have to create a good tactile experience, where a difference of 0.1 inch is not going to be relevant, but it might make it easier to distinguish between the individual sinks.
The ultimate goal is to indicate how one object exactly relates to the other.
Another example would be that if we scaled a paper holder accurately, it would be so small that it is impossible to touch what shape it is, so we will make it just slightly larger for a good tactile experience.
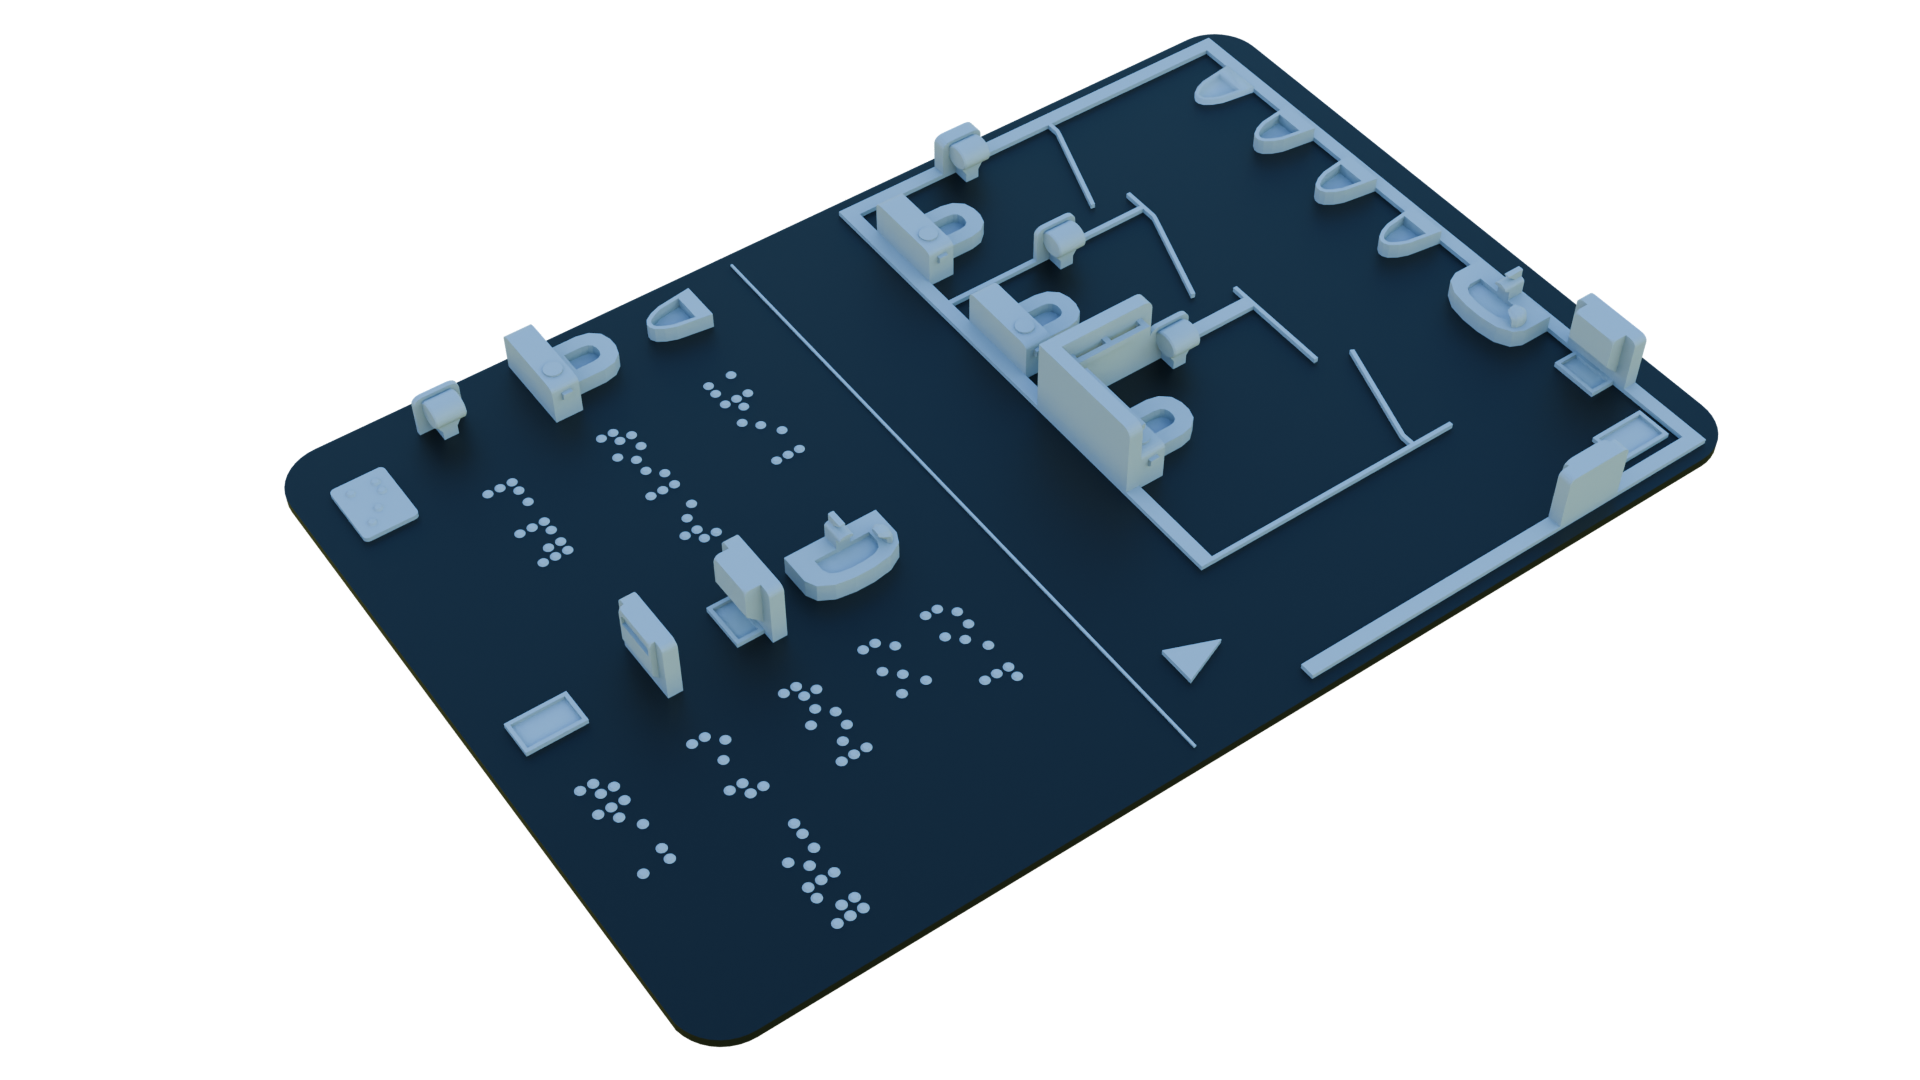
Below is a picture of a final 3D tactile restroom map.